dgfdg

Loading...
Gadget by The Blog Doctor.
Read more: http://www.blogdoctor.me/2009/01/random-rotating-post-gadget-with.html#ixzz2UMHl8Fc6

Pages

Showing posts with label tips and tricks. Show all posts

BlueStacks 0.8.12.3119

Downlaod Desired (preferred) Bit-torrent computer file with IDM!! [High Speed]


Downlaod Desired (preferred) Bit-torrent computer file with IDM!! 


Steps to Follow:

a) First of all , you have to download the torrent file with the extension .torrent which you wish to download...!

b). Then open up the browser page and go to http://torcache.net/ and post the torrent computer file that you have just downloaded and click on the cache button..,,!

c). This provides you with a new torrent computer file . You just have to copy the address (url) of the new torrent computer file from the newly opened up browser window..,,..!

d). Then visit to the web page http://www.torrific.com(Down these days) or http://zbigz.com/ (preferable) or http://torrent2exe.com/beta/and make an user account (in case you do not have one) and sign in to your Account. Then paste the address(url) of the new torrent acquired in step (c) and push the Get Button.,.,,...!

e) Now you will get the list of available Downloadable Files present in that torrent computer file. Then press on the begin bittorrent transmission button. This will provide full choice to download the desired file. Just press on any weblink and you can see the Internt download manager-IDM coming out for downloading the computer file.,.,.!!

How To Boot Windows 8 In Safe Mode.


How To Boot Windows 8 In Safe Mode.


Guys Today We Will Learn How to Boot Windows 8 In safe mode. Safe Mode In Windows Is an Essential Tool . If your Computer Is Affected With Malwares Or There Are Frequent Crashes and There Doesn't Seem any way to Fix it, Then Safe Mode is the Only Way To Start Your Computer.


Safe mode Boots Your Computer Without Loading any Third Party Software. It Uses Most Basic Drivers and Programs That Are Required To Start Windows.

To Boot Windows 7 and Earlier in Safe Mode Was Much Easier > Press F8 Key While Computer Is Booting and Then Click on Safe mode, But In Windows 8 We Need to Do So By Advance Startup Option Menu.


How To Boot Windows 8 In Safe Mode
Step 1: Go to Windows 8 Start Screen , Search " Advance " in setting Catagory. Now Click on Advance Startup Option.


Step 2: Now You Can See General PC Setting Screen. Scroll Down There You will Find Advance Startup as Shown In Below Picture.


Step 3: Click On Restart Now Button, After Which You Will Be Taken To Advance Startup Option Menu Where You will Be Asked To Choose and Option From 1) Continue 2) Troubleshoot. and 3) Turn Of Your Pc.

Step 4: Select TroubleShoot Then Advanced Option Button and Then Startup Setting Button.


Step 5: Click On Restart , Now Your Computer Will Restart and You will Be Shown Startup Setting Menu. As Below Pic


Step 6: Now You Can Enable Safe Mode and Start your Windows 8 In Safe Mode.


A New Lease Of Life: Tuning Up An Ailing PC


A New Lease Of Life: Tuning Up An Ailing PC


Watching your PC grind to a halt is a frustrating experience for any technology user. It can feel like the gradual slow-down process begins as soon as you plug your shiny new device in for the first time: a few seconds longer to boot up here, a crashed program there, and before you know it you’re keeping a good book on standby to occupy you during the endless loading screens.

However, PC slowdown isn’t something you need to resign yourself to. There are a number of strategies you can use to help you get your computer back in peak condition, with all of them significantly cheaper than buying a new machine.


Run a Tune-Up Program  Tune-up programs are all-in-one solutions designed to identify and fix common causes of sluggish PC operation. A little like a virus checker, the idea behind the tune-up program is usually that you simply hit “run” and go make a coffee while the software works its magic. Common targets for tune-up programs include your registry (a collection of settings and system files that your computer needs to run, which can become clogged with junk very quickly once you’ve installed and deleted a few programs), and any temporary file folders that should have been emptied but haven’t.

On the whole, tune-up software can provide a quick fix for those who want to get their machine back to something approaching full strength as quickly as possible. However, they are rarely a permanent solution, as the problems they fix can often reoccur. In addition, some tune-up programs are designed to run permanently in the background while you work, and can cause as many speed issues as they resolve.

Clean the Gunk From Your PCYou’d probably be amazed at how dirty the inside of your PC can get, and you might also be surprised what effect this can have on performance. Cleaning your computer requires a degree of technical know-how, and generally requires you to go through the nerve-wracking process of opening your machine’s casing. However, learning to clean your computer is good practice, and can be a prudent step toward keeping your computer healthy for as long as possible.

The best way to go about cleaning your device is with a can of compressed air. These computer technician mainstays look a little like a deodorant can, squirting compressed air from a small nozzle at the top. This is great for working on the insides of a computer, which can be very sensitive and susceptible to static electricity from your hands. Make sure you don’t use too much on delicate components like fans, however. Once you’re finished with the compressed air, use a cotton swab to gently prise any remaining grime loose.


Don't Miss: FreeRAM XP Pro To Increase Your System's Speed

Use a Computer Repair ServiceIf tweaking your computer yourself fails, then contracting a computer repair service may well be your best bet. Computer repairs aren’t just limited to major faults: many providers offer tune-up or tweaking services designed to improve the condition of a working but slow PC.

Sending your computer away to be worked on can seem like a big risk, especially if your machine has personal or sensitive data on it. Happily, some companies now offer online computer repairs, whereby technicians can examine and work on your computer using remote access software. As well as being convenient, this means that you don’t risk having your machine damaged in transit, or having guests visit potentially sensitive areas of your workplace.

Use Your Facebook In a Whole new Look


Use Your Facebook In a Whole new Look


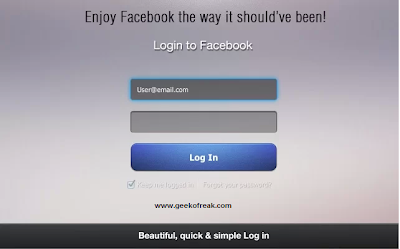
Hey guys , hope you all are fine. Today we gonna see how to change your facebook or use your facebook account in a whole new way.

Yes you can, For this you should have Google chrome browser,Just One chrome extension and everything is changed. As we all know Facebook makes changes time to time, In this post i will show you how to give a brand new and awesome look to your facebook account.

Just Follow these steps to change Facebook layout.

Step 1: Click Here And get the NewGenBook Desktop extension for your google chrome browser.

Step 2: Now on the right hand side top you will see Add To chrome Button, Click on it and For confirmation click Ok again.

Step3: Wait a few seconts to install the extension to your google chrome browser.

Step 4:Thats it now open Facebook and experience the whole new look of facebook.


This is how my facebook looks ,Its just a left panel.


This is how my Chat box looks.


If in case you think you want to switch to earlier layout then just click on Customize and control google chrome button on right side at top of you browser. Then navigate to Tools>extension then disable NewGenBook Desktop

HOW TO KNOW ADMIN PASSWORD THROUGH GUEST ACCOUNT


HOW TO KNOW  ADMIN PASSWORD THROUGH GUEST ACCOUNT


If you been using someones Pc in guest account and want to have Admin privilage then worry not,there is a trick for you to Gain Admin Privilage .
lets get started with it.


Method 1.

1) Go to C:/windows/system32.

2) Copy cmd.exe and paste it on desktop.

3) Rename cmd.exe to sethc.exe.

4) Copy the new sethc.exe to system 32,when windows asks for overwriting the file,then click yes.

5) Now Log out from your guest account and at the user select window,press shift key 5 times.

6) Instead of Sticky Key confirmation dialog,command prompt with full administrator privileges will open.

7) Now type “ NET USER ADMINISTRATOR "zzz" where “zzz" can be any password you like and press enter.

8) You will see “ The Command completed successfully" and then exit the command prompt and login into administrator with your new password.


9) Bravo !! Now You have hacked admin through guest account.


Method 2
This is another method you can use to hack admin password without knowing it.
It is possible to change Adminstrator password both in Win XP and Vista without knowing it. If you some how manage to login as an Administrator then you can change the password without knowing it.

Here’s the Step-By-Step instructions.

1. Right-click on the “My Computer” icon on the desktop OR in the Start Menu.

2. Select the option “Manage”.

3. On the left pane expand the “Computer Management (Local) tree (if it is not already expanded)

4. Double click “Local Users and Groups” option From “System Tools” tree.

5. Click the “Users” option.

6. Now you will see the list of users on the right side pane, such as Administrator, Guest etc.

7. Right click the “Administrator” and select the option “Set Password” option.

8. Now you will see a warning message, Click on proceed.

9. Now the system asks you for “New Password” and “Confirm Password” .

10. After entering the password click on “OK”. The password is changed. That’s It!..

you have now successfully changed admin password without knowing it.

Edit, check, back up and manage your HOSTS file with HostsMan


Edit, check, back up and manage your HOSTS file with HostsMan


The Windows HOSTS file is based on a simple idea – it just redirects specific domain names to your preferred IP address – but this has some very useful applications. If you want to block access to a particular website, for instance, just add its domain name to HOSTS, point it to an IP address representing your local system (127.0.0.1, usually), and you won’t be able to reach the site in any browser.
But that’s just the start. You could also use HOSTS to block advertising servers, and known malicious sites. And sometimes malware will tweak your HOSTS file to gain control over your internet access. If you want to review all this then you could just open HOSTS in Notepad, but HostsMan could be a much better option – it’s a compact, portable and free HOSTS file manager with a stack of features.
Launch HostsMan as an administrator and you might start by viewing your own HOSTS file. Click Editor, the file will appear, and you can browse it to see what entries (if any) it contains.
There are plenty of editing options here. Right-click and you’ll find options to create, edit, disable or delete entries, copy them to and from the clipboard, and add comments. An Edit > Find option contains a powerful search feature, with regular expression support, to help you locate particular entries. And useful management features include options to delete the empty lines in a file, the comments, and more.
It looks very basic - but beneath that compact interface is a very powerful HOSTS file manager
And better still, if you’re worried about malware then you can ask the program to look for possible hijacked HOSTS entries, or just display any which have been created or modified recently.
HostsMan has another very useful security function elsewhere, though in its Hosts Updater. This provides built-in access to seven popular HOSTS files which can help to block ad servers, known malicious sites, and so on. You can add more sources if necessary, then import these to update your own HOSTS file.
It’s worth keeping in mind that an incorrectly updated HOSTS file can cause problems, perhaps blocking access to sites you’d like to reach (especially relevant as this is a beta version, and bugs are to be expected). Fortunately HostsMan also includes a backup tool where you can save your current HOSTS file, and restore it later if necessary. Click Tools > Backup Manager, then Create Backup to save your current HOSTS. Or, if you want to return to the default Windows HOSTS setup with no redirections at all, click “* Original Hosts *” > Restore Backup.
And just in case this isn’t enough, HostsMan also contains several time-saving shortcuts. If a HOSTS file change doesn’t work right away, for instance, it could be because Windows has cached the previous IP address; click Tools > Flush DNS Cache to try again. Or, if you want to update or access the file yourself, there’s no need to manually browse to it: just click Tools > Open Hosts Folder, and there are menu entries to open it in Explorer, a command window or PowerShell.
There are plenty of powerful functions here, and as HostsMan 4 is also in beta right now it’s probably not a good choice for networking beginners.
If you’re already used to exploring your HOSTS file, though, the program should prove an excellent assistant which will make the management process very much easier.

EXTEND THE WINDOWS RUN BOX WITH RUN-COMMAND 1.00


Extend the Windows Run box with Run-Command 1.00

The Windows Run box has always been a quick and easy way to launch programs, but it’s not exactly packed with features. You can specify an application to launch, choose something you’ve run recently from the History list, and, well, that’s about it.
You don’t have to live with these limitations, though. Grab a copy of the new Run-Command and it’ll take your Run box to a whole new level.
The program is a tiny download (42KB), so you can just unzip and  go. And it’s extremely portable. There are no .NET or other major dependencies, and the author says it’ll run on anything from Windows 98 to 8.

Launch Run-Command and at a minimum it’ll work more or less like the regular Run box. You can enter a URL, file or folder name (or browse to it), press Enter or click Run and it’ll launch as usual.
There’s also a button to run programs as an administrator, though. (You can do the same thing from the regular Run box by entering a program name and pressing Ctrl+Shift+Enter, if you remember, but this is certainly easier.)

It's the Run box, with extras: buttons, icons, even a whole Start Menu-type system
There are easy ways to launch commonly-used tools. So for instance Run-Command has built-in icons for Regedit, Cmd.exe, the Computer Management and System Properties dialogs, and more.
There’s even a customisable Favorites system, which acts something like a mini Start menu. It comes with built-in links to many system tools, but you can also add more of your own. And if you’re using Run-Command from a USB stick then this could help you to create your own portable working environment.
Through all of this the program does its best to stay out of your way, by default minimising to the system tray. But it’s easy to launch via the regular Win+R key (although you can change this to whatever you like). And background RAM use is reasonable at around 7MB.
There is also one annoying bug. Our test PC happened to have the display of icons on the desktop turned off, but we noticed that launching Run-Command (and closing it) caused them to be displayed again. There’s no harm done, you can just hide them once more, but it still quickly becomes extremely irritating.
This may not be an issue which applies to all systems, though. And if you allow icons to be displayed on your desktop then this won’t be an issue, anyway. So if you’re interested in the idea, don’t let this put you off: just download Run-Command and see how it works for you.

HIDE FILES AND FOLDERS WITH COMMANT PROMPT

HIDE FILES AND FOLDERS WITH COMMANT PROMPT


Hello Guys. I hope you all are fine. Its Exams time, Manny must be busy with studies like me. 

So today we gonna see how to hide Files And Folders With Command Promt.

Earlier we already saw How to Create Password protected files/Folders without software , Today we will see how to hide Files and Folders with Command promt. If you have any personal or confidencial data in your pc and you dont wanna let other to peep it. then this trick will be very helpfull to you.

So lets get started with it.

For instance: Say you have a folder with name "Photos" which is stored in drive " D "  and you think strangers should not see this folder then to hide that folder do the followings. 

STEPS :

  1. Press Windowskey + Run , Run command will appear.
  2. In that type cmd and press enter. This will open Command prompt 
  3. Now Type "attrib +s +h D:\Photos" then press enter. 
  4. Thats it your folder is now hidden, if not thenthere will be some mistake done by you. (you will have to change the directory accordingly.once hidden it cannot be viewed by any search option.)
  5. Once hidden, now you want to unhide it again, simply use the same command but replace '+' with '-' on both flags 's' and 'h' (For eg : "attrib -s -h D:\Photos" )

HOW TO HIDE TEXT IN IMAGE FILE

HOW TO HIDE TEXT IN IMAGE FILE


Hi Guys. Today we will see how to hide TextMessage in any image file.
This is an awesome trick and very easy one too. IF you wish to send a text messega to you friends privately or you yourself want to hide a textmessage in image file then this article will help you a lot.


After hiding the message in a image file there will be no damage to the file just the size of the file will increase a bit.

So lets check how it is done.

First of all open run and type cmd., click enter. This will open Command promt.
Now you have to navigate to the folder where you have copied the files(1 .jpg file and 1 txt file which contains your message.)


For example, if your files are in "D" drive, then after opening cmd, type, D: and hit enter, now you are in your d drive, now if your folder name is Photos then type "cd photos"  (without quotes) now you are in photos folder.

Now main step. Type this command after navigating to the folder.


copy /b imagefilename.jpg + textfilename.txt outputimagename.jpg
Type the exact code, but dont forgot to replace the few words, imagefilename.jpg with your image file name and with proper extension, textfilename.txt with your text file, outputimagename.jpg your output image name, use whatever you want, but remember to use right extension.All done by now your message has been hiden in you image and a new folder will be created in the same folder with the name you wrote in place of outputimagename.jpg.

As everything is done by now. you must be thinking how to view the message now.
dont worry we will see that too. its very simple .
You just have to open the output file with notepad, scroll down to the bottom. check the last line.
you message will be displayed there.

HOW TO HACK SAVED PASSWORD ON CHROME


HOW TO HACK SAVED PASSWORD ON CHROME


Hey Guys,  Today i will provide you an awesome trick to hack saved password on Google chrome.
this is an awesome trick, You might have experienced when you login to any site say Facebook, Google asks you to save your password,
Ever wondered where this password is saved in Chrome, no ?
Dont worry, today we will learn it very easily.

In just 3 simple steps we will learn how to hack passwords on google chrome.
If you know that you brother or friend saves his password in chrome and you want to know his password, then this trick will definately help you out.

Lets check it.


Step :1 
First of all Open Google Chrome, the you will find Google menu at the top right corner. click it.

Step :2 
Now Click on setting at the bottom, a new tab will open, Scroll down and click on Show Advance Setting. There you will find Passwords and Forms,
Refer the below picture and as shown there click on  Manage Saved Password.


Step :3 
Now we are almost done. after click on Manage Saved Passwords  you will get the lists of saved password, Only thing you have to do is click on Any saved password and then click on Show,
Thats it.  you will get the password.

12 TOP TRICKS TO MAKE WINDOWS 8 FUN

12 TOP TRICKS TO MAKE WINDOWS 8 FUN


Hello friends, today we are gonna discuss about  top tricks to make you windows 8 fun, manny of you would have updated to windows 8 and are enjoying it like me, but this article will help you to know your windows 8 better. windows 8 is made for speed . its a fact that windows 8 is much faster, more responsive and smoother.those who are using this operating system are enjoying the experience.
Here are some tricks which will make windows 8 much more interesting. and if you are using windows 8 on a touch screen device it will be a fun experience.

1. Overview Your Entire Start Screen By Semantic Zoom
If you’re using a touch screen, squeeze the Start screen with two fingers to receive a bird’s eye view of your entire screen contents. This is useful when you have a lots of apps/programs installed and want to see all the apps without scrolling the contents up and down.

2. Use Windows Hot Corners
The corners on your screen provides you to different Windows features. Below, is a brief explanation of each of these corners.

Bottom Left-hand corner of the screen will allow you to access the Start screen, if you’re in the Start screen and have the Desktop open, this corner will open the Desktop from the Start screen.
Quick Tip: Right-clicking in the left hand corner will open the power user menu.

Moving the mouse to the top-left corner and then down will display all the apps running on the computer. Clicking and dragging any of these apps to the left or right-hand side of the screen will snap that app to that side of the screen. Each of these open app icons can also be right-clicked to close or snap.

On the full right-hand side of the screen will be given access to the Windows Charms.

3. Why Close Buttons Are Hard To Find?
Closing a program seems easy, but you might have noticed that close buttons are hard to find in Windows 8. That’s because Microsoft encourages us to run apps in the background where they’ll take up minimal resources, but still be accessible at any time!
Still, anyway, you can close an app 1) by dragging it from top to bottom, or 2) using Alt+F4 keys or 3) using the task manager.

4. Find Anything Using Power-packed Search
Search looks power-packed. Start typing anything you are looking for in the search bar and it will search in the apps, files/folders and emails too.

5. Windows 8 God Mode Folder?
Create a magic folder which contains all the Windows 8 setings and hidden tweaks:
1. Create a “New Folder” by right-clicking on empty spot in any directory, preferably Desktop.
2. Give the folder this name: All Settings .{ED7BA470-8E54-465E-825C-99712043E01C}
3. Open the folder to see a complete list of settings.
But be careful for using advanced settings, don’t change them unless you are an expert.

6. PC Slowed Down? Get Fresh Windows 8 Easily in Minutes!
In Windows 7 and previous versions, you had to format and reinstall the entire OS to get a fresh feel. This was a tiresome and time-wasting process. Windows 8 provides an in-built way to refresh your computer!

In order to perform the Windows 8 refresh, go to Settings and click the Change PC Settings tab near the bottom. Select the General tab and find the “Refresh your PC without affecting your files” section near the middle (you may also select “Remove everything and reinstall Windows” to get the true factory settings treatment). Select “Get started” and press “Refresh.” After a few minutes the PC will restart, and you will have a fresh copy of Windows 8.

7. Shut Down Shortcut:
Windows 8 hides the Power button in the Settings menu, so it takes multistep process just to shut down your PC. But you can pin a Shutdown button right onto the bottom of your desktop using following trick:
Create a shortcut on your desktop (right-click, go to New, then Shortcut). Enter “shutdown /s /t 0″ (with no quotes, and, yes, that’s a zero not an “O”) as the location of the item, and press Next. Now name the shortcut (prefereably “Shutdown”) and press Finish.

Right-click the shortcut, and navigate to Properties. Choose Change Icon in the Shortcut tab, and then OK to leave the warning box. Choose an icon of your choice from the list. In the screenshot above, you’ll see we chose a Power button.
Right-click the shortcut again, and select Pin to Start. You can place the icon on your Start screen wherever it’s convenient. Clicking it will instantly shut down your computer.

But which one is the easiest and fastest way to shutdown? Hit power button on your computer!

8. Classic Start Menu
This is the thing many people keep missing on Windows 8. If you want to anyway want the Start menu on Windows 8,
ViStart, a free utility will do a good job.

9. Fun Way To Password-protect
Windows 8 enables you to create a picture password, where you choose an image, then draw on it in a combination of taps, lines and circles – only someone who can reproduce this pattern will be able to log on. Select Win + I > More PC Settings > Users > Create a Picture Password to give this a try.

10. Mount ISO files in Windows 8
Right-click it in Explorer, click Mount and you can view it as a virtual drive, launch the files it contains, or add more if you like.

11. Windows 8 Recovery Options
Windows 8 provides useful, advanced options to recover when a disaster occurs.

12. List of Most Important Hotkeys
Here is a list of hotkeys to make your Windows 8 experiece even a fun:

Win : switch between the Start screen and the last-running Windows 8 app
Win + C : displays the Charms: the Settings, Devices, Share and Search options
Win + D : launches the desktop
Win + E : launches Explorer
Win + F : opens the File Search pane
Win + H : opens the Share pane
Win + I : opens Settings
Win + K : opens the Devices pane
Win + L : locks your PC
Win + M : minimises the current Explorer or Internet Explorer window (works in the full-screen IE, too)
Win + O : toggles device orientation lock on and off
Win + P : switch your display to a second display or projector
Win + Q : open the App Search pane
Win + R : opens the Run box
Win + U : open the Ease of Access Centre
Win + V : cycle through toasts (notifications)
Win + W : search your system settings (type POWER for links to all power-related options, say)
Win + X : displays a text menu of useful Windows tools and applets
Win + Z : displays the right-click context menu when in a full-screen app
Win + + : launch Magnifier and zoom in
Win + – : zoom out
Win +  , : Aero peek at the desktop
Win + Enter : launch Narrator
Win + PgUp : move the current screen to the left-hand monitor
Win + PgDn : move the current screen to the right-hand monitor
Win + PrtSc : capture the current screen and save it to your Pictures folder
Win + Tab : switch between running apps


HACK ADMIN PASSWORD THROUGH GUEST ACCOUNT


HACK ADMIN PASSWORD THROUGH GUEST ACCOUNT 
Hello guys, Today will provide you 2 awesome and easytrick through which you can hack admin account through guest account.
If you been using someones Pc in guest account and want to have Admin privilage then worry not,there is a trick for you to Gain Admin Privilage .
lets get started with it.

Method 1.

1) Go to C:/windows/system32.

2) Copy cmd.exe and paste it on desktop.

3) Rename cmd.exe to sethc.exe.

4) Copy the new sethc.exe to system 32,when windowsasks for overwriting the file,then click yes.

5) Now Log out from your guest account and at the user select window,press shift key 5 times.

6) Instead of Sticky Key confirmation dialog,command prompt with full administrator privileges will open.

7) Now type “ NET USER ADMINISTRATOR "zzz" where “zzz" can be any password you like and press enter.

8) You will see “ The Command completed successfully" and then exit the command prompt and login into administrator with your new password.


9) Bravo !! Now You have hacked admin through guest account.


Method 2

This is another method you can use to hack admin password without knowing it.
It is possible to change Adminstrator password both in Win XP and Vista without knowing it. If you some how manage to login as an Administrator then you can change the password without knowing it.


Here’s the Step-By-Step instructions. 

1. Right-click on the “My Computer” icon on the desktop OR in the Start Menu.

2. Select the option “Manage”.

3. On the left pane expand the “Computer Management (Local) tree (if it is not already expanded)


4. Double click “Local Users and Groups” option From “System Tools” tree.


5. Click the “Users” option.


6. Now you will see the list of users on the right side pane, such as Administrator, Guest etc.


7. Right click the “Administrator” and select the option “Set Password” option.


8. Now you will see a warning message, Click on proceed.


9. Now the system asks you for “New Password” and “Confirm Password” .


10. After entering the password click on “OK”. The password is changed. That’s It!..


you have now successfully changed admin password without knowing it.

I hope you like both the methods that i provied you today.

I also hope you will recommend us on Google before reading next article. plz click g+1

thanks :)