dgfdg

Loading...
Gadget by The Blog Doctor.
Read more: http://www.blogdoctor.me/2009/01/random-rotating-post-gadget-with.html#ixzz2UMHl8Fc6

Pages

MakeMKV 1.7.10 Beta is your one-click solution to ripping media to your hard drive


MakeMKV 1.7.10 Beta is your one-click solution to ripping media to your hard drive


Everyone’s looking for that magic one-click solution to digitizing their personal video and movies collection. Often you find yourself having to jump through a number of hoops before you can get the movies in a format you like, but if you’re looking for a perfect 1:1 rip in MKV format, then MakeMKV 1.7.10 Beta is the tool for you.
MakeMKV 1.7.10 runs on Windows and Mac, and lets you simply select your DVD or Blu-ray disc, pick an output folder and click a button to rip it. Better still, it produces a 1:1 copy in much less time than other tools, and is completely free to use while in beta.
MakeMKV works with both physical discs and previously ripped ISO files. If quality is king, then this is the tool for you as it always produces an exact digital copy with no compression in the popular MKV format using the video’s original codecs. From here you can simply add the file to your media collection, or if you’re looking to convert it into a different format for compatibility purposes or to produce a smaller, compressed file, load it into another app such as Handbrake for Apple-friendly MP4, or Freemake Video Converter for a wider choice of output formats.
Rip DVDs and Blu-rays to MKV format quickly and easily with MakeMKV Beta.
MakeMKV reads both DVD and Blu-ray discs, including protected formats, although support for Blu-ray will only be free while the app remains in beta. The output file preserves all video and audio tracks (including HD) as well as chapter information and other meta-data, although there’s no facility for editing this within the app itself.
The key thing to recommend MakeMKV is the speed of the conversion – it’s basically hampered only by the read speed of your drive, which makes it worth considering even if you’re subsequently looking to convert the file elsewhere but have problems reading it from the original disc.
The program is undergoing rapid changes – the latest build just released improves handling of DVD discs with mastering errors and adds unspecified “miscellaneous improvements”. Other notable changes in recent months include support for AACS v35, an updated BD+ engine and the addition of two profiles (WDTV and FLAC), accessible from the Advanced tab of the program’s Preferences dialog (users must first tick “Expert mode” on the General tab to make this visible).
MakeMKV 1.7.10 Beta is a free-during-beta download for Windows and Mac. Beta versions work without registration for 30 days, after which users must insert a free beta key to continue using all the program’s functionality. This can be found on the program forum. When this expires, a new beta key can be found at the same link, or users can opt to purchase the full version ahead of its final release.

Edit, check, back up and manage your HOSTS file with HostsMan


Edit, check, back up and manage your HOSTS file with HostsMan


The Windows HOSTS file is based on a simple idea – it just redirects specific domain names to your preferred IP address – but this has some very useful applications. If you want to block access to a particular website, for instance, just add its domain name to HOSTS, point it to an IP address representing your local system (127.0.0.1, usually), and you won’t be able to reach the site in any browser.
But that’s just the start. You could also use HOSTS to block advertising servers, and known malicious sites. And sometimes malware will tweak your HOSTS file to gain control over your internet access. If you want to review all this then you could just open HOSTS in Notepad, but HostsMan could be a much better option – it’s a compact, portable and free HOSTS file manager with a stack of features.
Launch HostsMan as an administrator and you might start by viewing your own HOSTS file. Click Editor, the file will appear, and you can browse it to see what entries (if any) it contains.
There are plenty of editing options here. Right-click and you’ll find options to create, edit, disable or delete entries, copy them to and from the clipboard, and add comments. An Edit > Find option contains a powerful search feature, with regular expression support, to help you locate particular entries. And useful management features include options to delete the empty lines in a file, the comments, and more.
It looks very basic - but beneath that compact interface is a very powerful HOSTS file manager
And better still, if you’re worried about malware then you can ask the program to look for possible hijacked HOSTS entries, or just display any which have been created or modified recently.
HostsMan has another very useful security function elsewhere, though in its Hosts Updater. This provides built-in access to seven popular HOSTS files which can help to block ad servers, known malicious sites, and so on. You can add more sources if necessary, then import these to update your own HOSTS file.
It’s worth keeping in mind that an incorrectly updated HOSTS file can cause problems, perhaps blocking access to sites you’d like to reach (especially relevant as this is a beta version, and bugs are to be expected). Fortunately HostsMan also includes a backup tool where you can save your current HOSTS file, and restore it later if necessary. Click Tools > Backup Manager, then Create Backup to save your current HOSTS. Or, if you want to return to the default Windows HOSTS setup with no redirections at all, click “* Original Hosts *” > Restore Backup.
And just in case this isn’t enough, HostsMan also contains several time-saving shortcuts. If a HOSTS file change doesn’t work right away, for instance, it could be because Windows has cached the previous IP address; click Tools > Flush DNS Cache to try again. Or, if you want to update or access the file yourself, there’s no need to manually browse to it: just click Tools > Open Hosts Folder, and there are menu entries to open it in Explorer, a command window or PowerShell.
There are plenty of powerful functions here, and as HostsMan 4 is also in beta right now it’s probably not a good choice for networking beginners.
If you’re already used to exploring your HOSTS file, though, the program should prove an excellent assistant which will make the management process very much easier.

TIME AND WORK


  1. TIME AND WORK

    1.Work from Days:
    If A can do a piece of work in n days, then A's 1 day's work =1.
    n
  2. Days from Work:
    If A's 1 day's work =1,then A can finish the work in n days.
    n
  3. Ratio:
    If A is thrice as good a workman as B, then:
    Ratio of work done by A and B = 3 : 1.
    Ratio of times taken by A and B to finish a work = 1 : 3.
    EXAMPLES
    1.A can do a work in 15 days and B in 20 days. If they work on it together for 4 days, then the fraction of the work that is left is :

    a) 1/4        b)1/10        c)7/15      d)8/15

    Answer: Option d
    Explanation:
    A's 1 day's work =1;
    15
    B's 1 day's work =1;
    20
    (A + B)'s 1 day's work =(1+1)=7.
    152060
    (A + B)'s 4 day's work =(7x 4)=7.
    6015
    Therefore, Remaining work =(1 -7)=8.
    1515

EXTEND THE WINDOWS RUN BOX WITH RUN-COMMAND 1.00


Extend the Windows Run box with Run-Command 1.00

The Windows Run box has always been a quick and easy way to launch programs, but it’s not exactly packed with features. You can specify an application to launch, choose something you’ve run recently from the History list, and, well, that’s about it.
You don’t have to live with these limitations, though. Grab a copy of the new Run-Command and it’ll take your Run box to a whole new level.
The program is a tiny download (42KB), so you can just unzip and  go. And it’s extremely portable. There are no .NET or other major dependencies, and the author says it’ll run on anything from Windows 98 to 8.

Launch Run-Command and at a minimum it’ll work more or less like the regular Run box. You can enter a URL, file or folder name (or browse to it), press Enter or click Run and it’ll launch as usual.
There’s also a button to run programs as an administrator, though. (You can do the same thing from the regular Run box by entering a program name and pressing Ctrl+Shift+Enter, if you remember, but this is certainly easier.)

It's the Run box, with extras: buttons, icons, even a whole Start Menu-type system
There are easy ways to launch commonly-used tools. So for instance Run-Command has built-in icons for Regedit, Cmd.exe, the Computer Management and System Properties dialogs, and more.
There’s even a customisable Favorites system, which acts something like a mini Start menu. It comes with built-in links to many system tools, but you can also add more of your own. And if you’re using Run-Command from a USB stick then this could help you to create your own portable working environment.
Through all of this the program does its best to stay out of your way, by default minimising to the system tray. But it’s easy to launch via the regular Win+R key (although you can change this to whatever you like). And background RAM use is reasonable at around 7MB.
There is also one annoying bug. Our test PC happened to have the display of icons on the desktop turned off, but we noticed that launching Run-Command (and closing it) caused them to be displayed again. There’s no harm done, you can just hide them once more, but it still quickly becomes extremely irritating.
This may not be an issue which applies to all systems, though. And if you allow icons to be displayed on your desktop then this won’t be an issue, anyway. So if you’re interested in the idea, don’t let this put you off: just download Run-Command and see how it works for you.

HIDE FILES AND FOLDERS WITH COMMANT PROMPT

HIDE FILES AND FOLDERS WITH COMMANT PROMPT


Hello Guys. I hope you all are fine. Its Exams time, Manny must be busy with studies like me. 

So today we gonna see how to hide Files And Folders With Command Promt.

Earlier we already saw How to Create Password protected files/Folders without software , Today we will see how to hide Files and Folders with Command promt. If you have any personal or confidencial data in your pc and you dont wanna let other to peep it. then this trick will be very helpfull to you.

So lets get started with it.

For instance: Say you have a folder with name "Photos" which is stored in drive " D "  and you think strangers should not see this folder then to hide that folder do the followings. 

STEPS :

  1. Press Windowskey + Run , Run command will appear.
  2. In that type cmd and press enter. This will open Command prompt 
  3. Now Type "attrib +s +h D:\Photos" then press enter. 
  4. Thats it your folder is now hidden, if not thenthere will be some mistake done by you. (you will have to change the directory accordingly.once hidden it cannot be viewed by any search option.)
  5. Once hidden, now you want to unhide it again, simply use the same command but replace '+' with '-' on both flags 's' and 'h' (For eg : "attrib -s -h D:\Photos" )

HOW TO HIDE TEXT IN IMAGE FILE

HOW TO HIDE TEXT IN IMAGE FILE


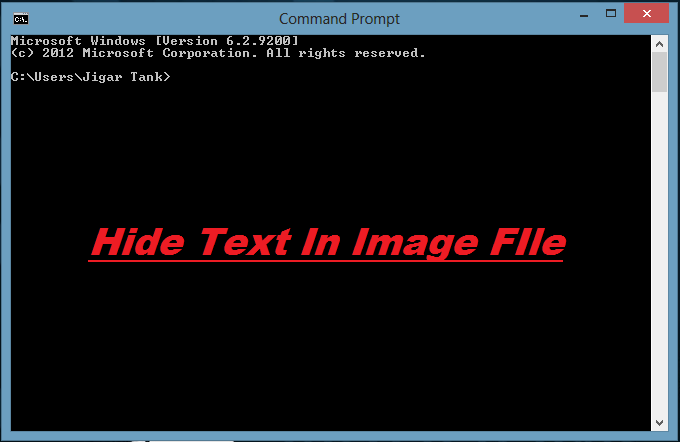
Hi Guys. Today we will see how to hide TextMessage in any image file.
This is an awesome trick and very easy one too. IF you wish to send a text messega to you friends privately or you yourself want to hide a textmessage in image file then this article will help you a lot.


After hiding the message in a image file there will be no damage to the file just the size of the file will increase a bit.

So lets check how it is done.

First of all open run and type cmd., click enter. This will open Command promt.
Now you have to navigate to the folder where you have copied the files(1 .jpg file and 1 txt file which contains your message.)


For example, if your files are in "D" drive, then after opening cmd, type, D: and hit enter, now you are in your d drive, now if your folder name is Photos then type "cd photos"  (without quotes) now you are in photos folder.

Now main step. Type this command after navigating to the folder.


copy /b imagefilename.jpg + textfilename.txt outputimagename.jpg
Type the exact code, but dont forgot to replace the few words, imagefilename.jpg with your image file name and with proper extension, textfilename.txt with your text file, outputimagename.jpg your output image name, use whatever you want, but remember to use right extension.All done by now your message has been hiden in you image and a new folder will be created in the same folder with the name you wrote in place of outputimagename.jpg.

As everything is done by now. you must be thinking how to view the message now.
dont worry we will see that too. its very simple .
You just have to open the output file with notepad, scroll down to the bottom. check the last line.
you message will be displayed there.

HTML Editors


HTML Editors


Writing HTML Using Notepad or TextEdit

HTML can be edited by using a professional HTML editor like:
  • Adobe Dreamweaver
  • Microsoft Expression Web
  • CoffeeCup HTML Editor
However, for learning HTML we recommend a text editor like Notepad (PC) or TextEdit (Mac). We believe using a simple text editor is a good way to learn HTML.
Follow the 4 steps below to create your first web page with Notepad.

Step 1: Start Notepad

To start Notepad go to:
Start
    All Programs
        Accessories
            Notepad

Step 2: Edit Your HTML with Notepad

Type your HTML code into your Notepad:
Notepad

Step 3: Save Your HTML

Select Save as.. in Notepad's file menu.
When you save an HTML file, you can use either the .htm or the .html file extension. There is no difference, it is entirely up to you.
Save the file in a folder that is easy to remember, like w3schools.

Step 4: Run the HTML in Your Browser

Start your web browser and open your html file from the FileOpen menu, or just browse the folder and double-click your HTML file.
The result should look much like this:
View in Browser